JAFPro
This repository contains official code for the paper
JAFPro: Joint Appearance Fusion and Propagation for Human Video Motion Transfer from Multiple Reference Images.
You can find detailed usage instructions for training from scratch and testing pre-trained model below.
If you find our code or paper useful, please consider citing
@inproceedings{10.1145/3394171.3414001,
author = {Yu, Xianggang and Liu, Haolin and Han, Xiaoguang and Li, Zhen and Xiong, Zixiang and Cui, Shuguang},
title = {JAFPro: Joint Appearance Fusion and Propagation for Human Video Motion Transfer from Multiple Reference Images},
year = {2020},
booktitle = {Proceedings of the 28th ACM International Conference on Multimedia},
}
Installation
First you have to make sure that you have all dependencies in place.
The simplest way to do so, is to use anaconda.
You can create an anaconda environment called JAFPro using
conda env create -f environment.yml
conda activate JAFPro
DanceVideo Dataset
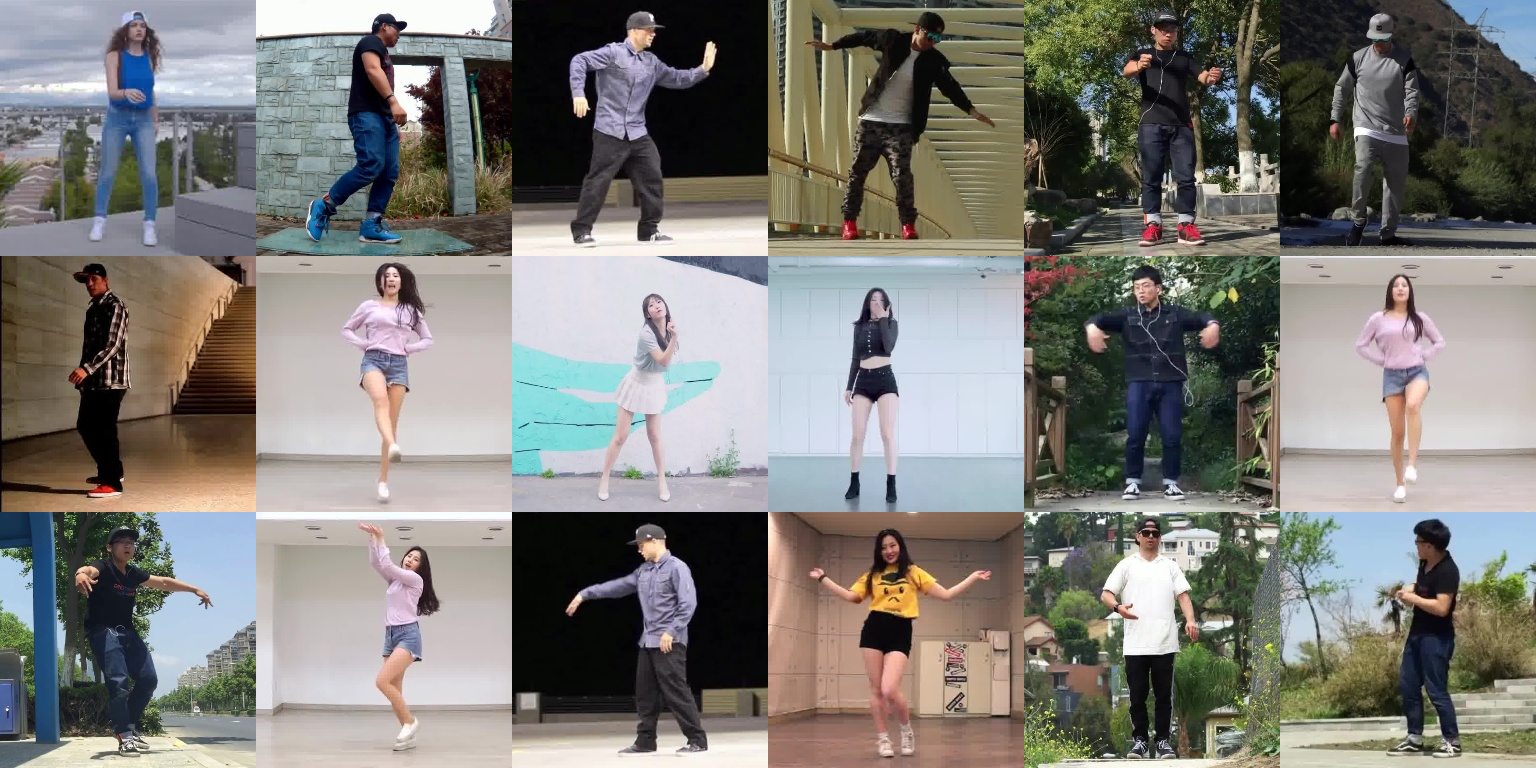
Our DanceVideo dataset consists of 1651 dance videos in the wild with static background. Each video has a length of two seconds with 15FPS (30 frames in total). The resolution of all videos is 256x256. You can download the whole dataset through https://drive.google.com/file/d/1xlybcxZXcQUCgUuq1K2FLaVGSr8d_NJW/view?usp=sharing
Usage
Once you have installed all dependencies and downloaded the dataset, you are ready to test our pre-trained model or train a model from scratch.
File structure
Except code directories, the scripts assume the following file structure.
JAFPro
├── checkpoints                # opt['model_save_dir'], where checkpoints placed
└── test_results               # opt["test_save_dir"], path to save test results
Testing pretrained model
At first, download the pretrained model from https://drive.google.com/file/d/1q4Lu6ayHG3-dAl5mE4b6tr6e-O3SHbye/view?usp=sharing, and unzip it into checkpoints directory.
JAFPro
├── checkpoints
	├── $model_name             # e.g. appearance_propagation_interval
		├── Accu_iter_xx.pth
		├── bg_iter_xx.pth
		├── inpaint_iter_xx.pth
		├── pro_iter_xx.pth
		├── refine_iter_xx.pth
Then, you have to setup the data root in options.py
opt['smpl_root'] = '/your/path/to/DanceVideo/smpls'
opt['mask_root'] = '/your/path/to/DanceVideo/masks'
opt['data_root'] = '/your/path/to/DanceVideo/images'
To test the pretrained model, run
cd test/
python conv_pro_test.py --gpu 0 -e appearance_propagation_interval -n 4
arguments explanation:
--gpu: specify gpu device
-e: experiment name (model_name). The program will load checkpoints from JAFPro/checkpoints/$model_name
-n: number of frames
And the results will be saved to test_results/$model_name
Calculate metrics
After testing a pretrained model, you can calculate metrics by running
python video_evaluation.py --pred /path/to/test/results/dir --gt /path/to/DanceVideo/images/test --gpu 0 --type densepose
such that the metric for each video and for whole test set will be printed to terminal.
Train a model from scratch
First, setup data root path in options.py
opt['smpl_root'] = '/your/path/to/DanceVideo/smpls'
opt['mask_root'] = '/your/path/to/DanceVideo/masks'
opt['data_root'] = '/your/path/to/DanceVideo/images'
Then,
xxx
You can monitor on http://localhost:6006 the training process using tensorboard:
cd OUTPUT_DIR
tensorboard --logdir ./monitoring --port 6006